My Dual-Boot Linux Media Server Setup
After getting my first big-girl paycheck, I built the gaming PC of my dreams - Ryzen CPU, 32GB of RAM, a solid GPU. I still game when I can, but these days the machine spends more time idle than in use.
At the same time, our growing collection of photos and videos - packed with memories - was starting to outgrow cloud storage. Rather than pay monthly for more space from Google or Apple, we bought two large hard drives and moved everything locally.
That left one challenge: how to actually access and enjoy that content from anywhere. The answer? Turn the PC into a dual-boot Linux media server.
Now it runs PhotoPrism for browsing and organizing our photo library, Jellyfin for streaming videos, and NoMachine for full remote desktop access - all securely available from any device thanks to Tailscale.
System Overview #
Before diving into the setup, here’s what each piece of the puzzle is for:
PhotoPrism is the photo library. It automatically indexes and organizes your local photo archive, adding smart features like search, face recognition, and location filtering - all from a clean, web-based interface.
Jellyfin is the video streaming service. It organizes your movies, TV shows, and home videos and lets you stream them to any device on demand.
Tailscale handles secure access. It creates a private network between your devices so you can access your server from anywhere without port forwarding or messing with your firewall.
NoMachine gives you full graphical remote access to the Linux desktop - perfect for when you want to run GUI apps or manage the machine as if you were sitting in front of it.
Step 1: Dual-Booting Ubuntu with Windows #
To preserve my gaming setup while adding a full Linux environment, I set up a dual-boot system with Windows 11 and Ubuntu 22.04. The internet is full of detailed guides on dual-booting, so I won’t reinvent the wheel here - but here’s a general outline of the process I followed.
A solid step-by-step guide I recommend:
How to Dual Boot Ubuntu and Windows
General Steps: #
- Shrink the Windows partition using Disk Management to free up space for Ubuntu.
- Download the Ubuntu ISO and flash it to a USB drive using Rufus. It’s a free and simple tool for creating bootable USBs on Windows.
- Boot from the USB and install Ubuntu in the newly created free space.
- Restart and test GRUB, which should allow you to choose between Ubuntu and Windows at boot time.
Step 2: Secure Networking with Tailscale #
Tailscale creates a secure WireGuard mesh network with no port forwarding.
Install Tailscale on Ubuntu: #
curl -fsSL https://tailscale.com/install.sh | sh
sudo tailscale up
You’ll get a private IP like 100.x.x.x and a DNS name like my-pc.tailnet-name.ts.net.
Now your services are accessible only to devices you authorize.
Step 3: Running Jellyfin and PhotoPrism with Docker #
Install Docker if it’s not already set up:
sudo apt install docker.io docker-compose
sudo usermod -aG docker $USER
Example docker-compose.yml: #
version: '3.7'

services:
  jellyfin:
    image: jellyfin/jellyfin
    container_name: jellyfin
    network_mode: host
    volumes:
      - /mnt/media/jellyfin/config:/config
      - /mnt/media/videos:/media
    restart: unless-stopped

  photoprism:
    image: photoprism/photoprism
    container_name: photoprism
    ports:
      - "2342:2342"
    volumes:
      - /mnt/photos:/photoprism/originals
      - /mnt/photos/storage:/photoprism/storage
    environment:
      - PHOTOPRISM_ADMIN_PASSWORD=YourSecurePassword
    restart: unless-stopped
Then run:
docker-compose up -d
Access via:
- Jellyfin:
http://<tailscale-ip>:8096 - PhotoPrism:
http://<tailscale-ip>:2342

Step 4: Remote Desktop with NoMachine #
To access the full Linux GUI remotely:
Download NoMachine for Linux: https://www.nomachine.com/download/linux&id=1
Install it:
sudo dpkg -i nomachine_*.deb
sudo apt-get install -f
NoMachine starts a remote desktop server accessible via the Tailscale IP.
On your client device: #
I usually connect from my Mac, but NoMachine has clients for just about every platform - including Windows, Linux, iOS, and Android.
- Install NoMachine for macOS (or your platform of choice).
- Make sure your device is connected to your Tailscale network.
- Open NoMachine - in most cases, your Linux server will automatically appear thanks to Tailscale’s MagicDNS.
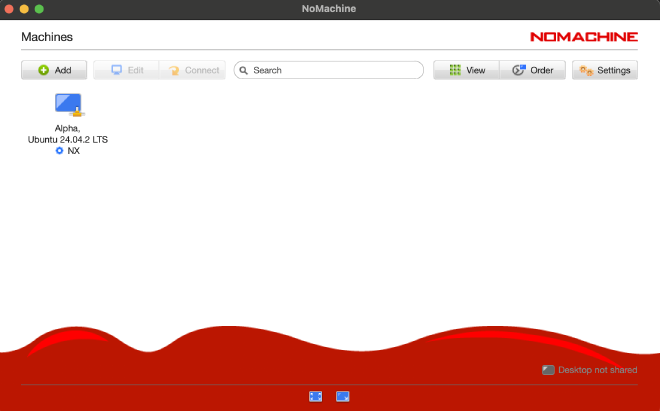
The NoMachine client on my Mac, connected over Tailscale. The Linux PC is named “Alpha.“

If it doesn’t, you can manually add a new connection:
- Protocol: NX
- Host:
100.x.x.x(your server’s Tailscale IP) - Port: 4000
Log in with your Linux username and password, and you’ll have full remote access to the desktop environment.
Use It From Anywhere #
With everything running over Tailscale:
- Access Jellyfin from your browser or TV apps
- Browse and organize photos in PhotoPrism
- Log in to your Linux desktop via NoMachine
- No port forwarding or firewall tweaking required
Conclusion #
What started as a powerful gaming PC is now my private, secure multimedia server - accessible from anywhere without compromising my network or opening firewall ports. With Tailscale, Docker, and NoMachine, I have full control and performance, whether I’m watching a movie or organizing photos from afar.